Shop › Forums › Build Threads › Adding LED Spark Plugs to a Radial Engine Kit
- This topic has 10 replies, 3 voices, and was last updated 4 years, 12 months ago by
spmartin1.
-
AuthorPosts
-
February 24, 2020 at 12:49 am #59
Don
Keymaster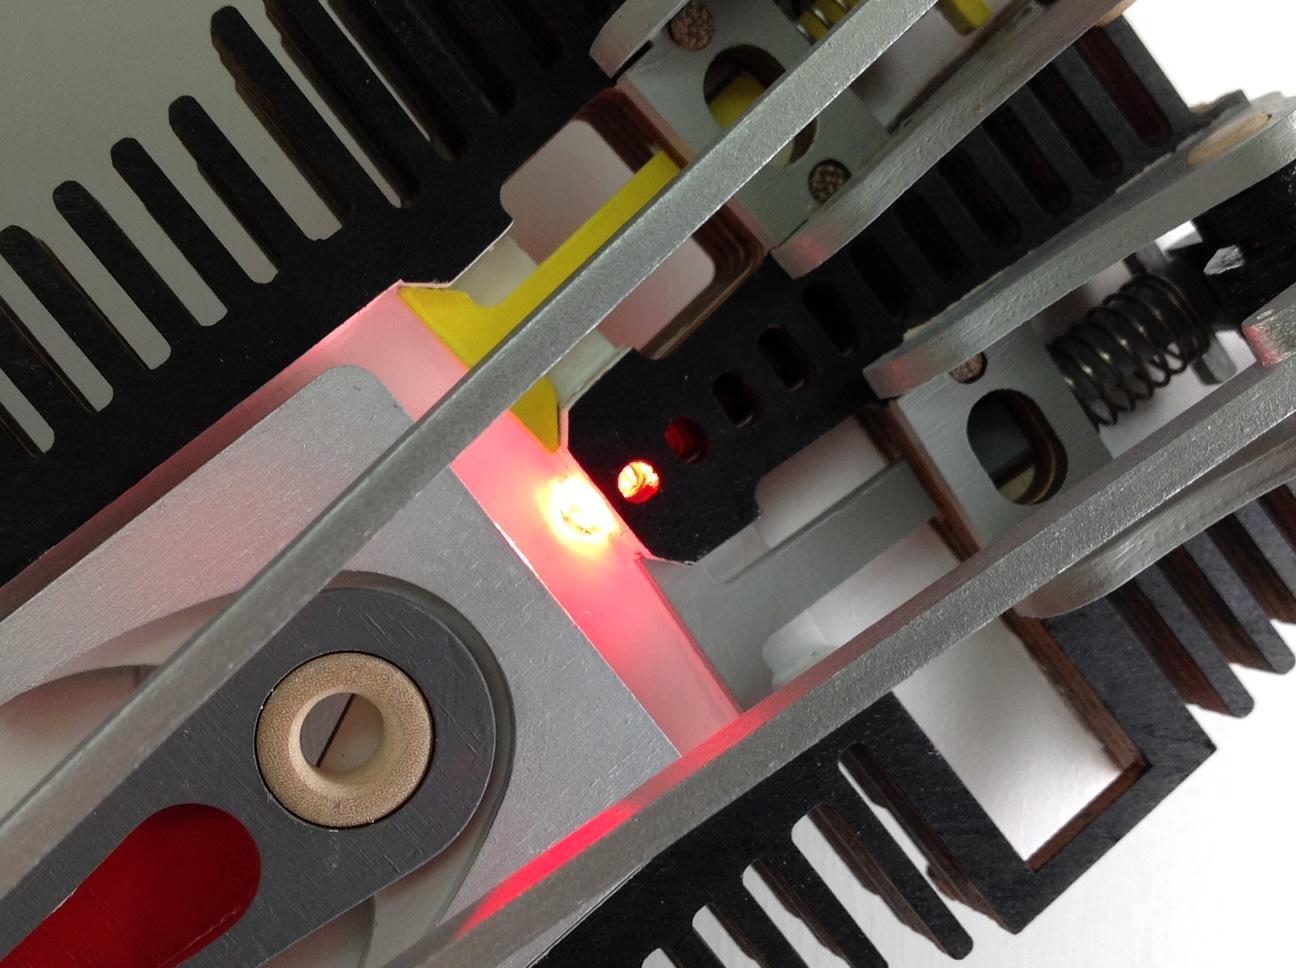
The following information was provided by Alan Duke. This was not his first Radial Engine build. I have published it in the build thread forum to share it with all of our users. Thanks, Alan, for your creativity and sharing.
Alan Introduces this engine:
This one I built a little differently as it is bolted together with nylon bolts and can be taken apart. Also added some colour and a ignition system with LEDs as spark plugs. Because the distributer is mounted on the back I had to make a motor mount so it could be mounted to a flat surface.
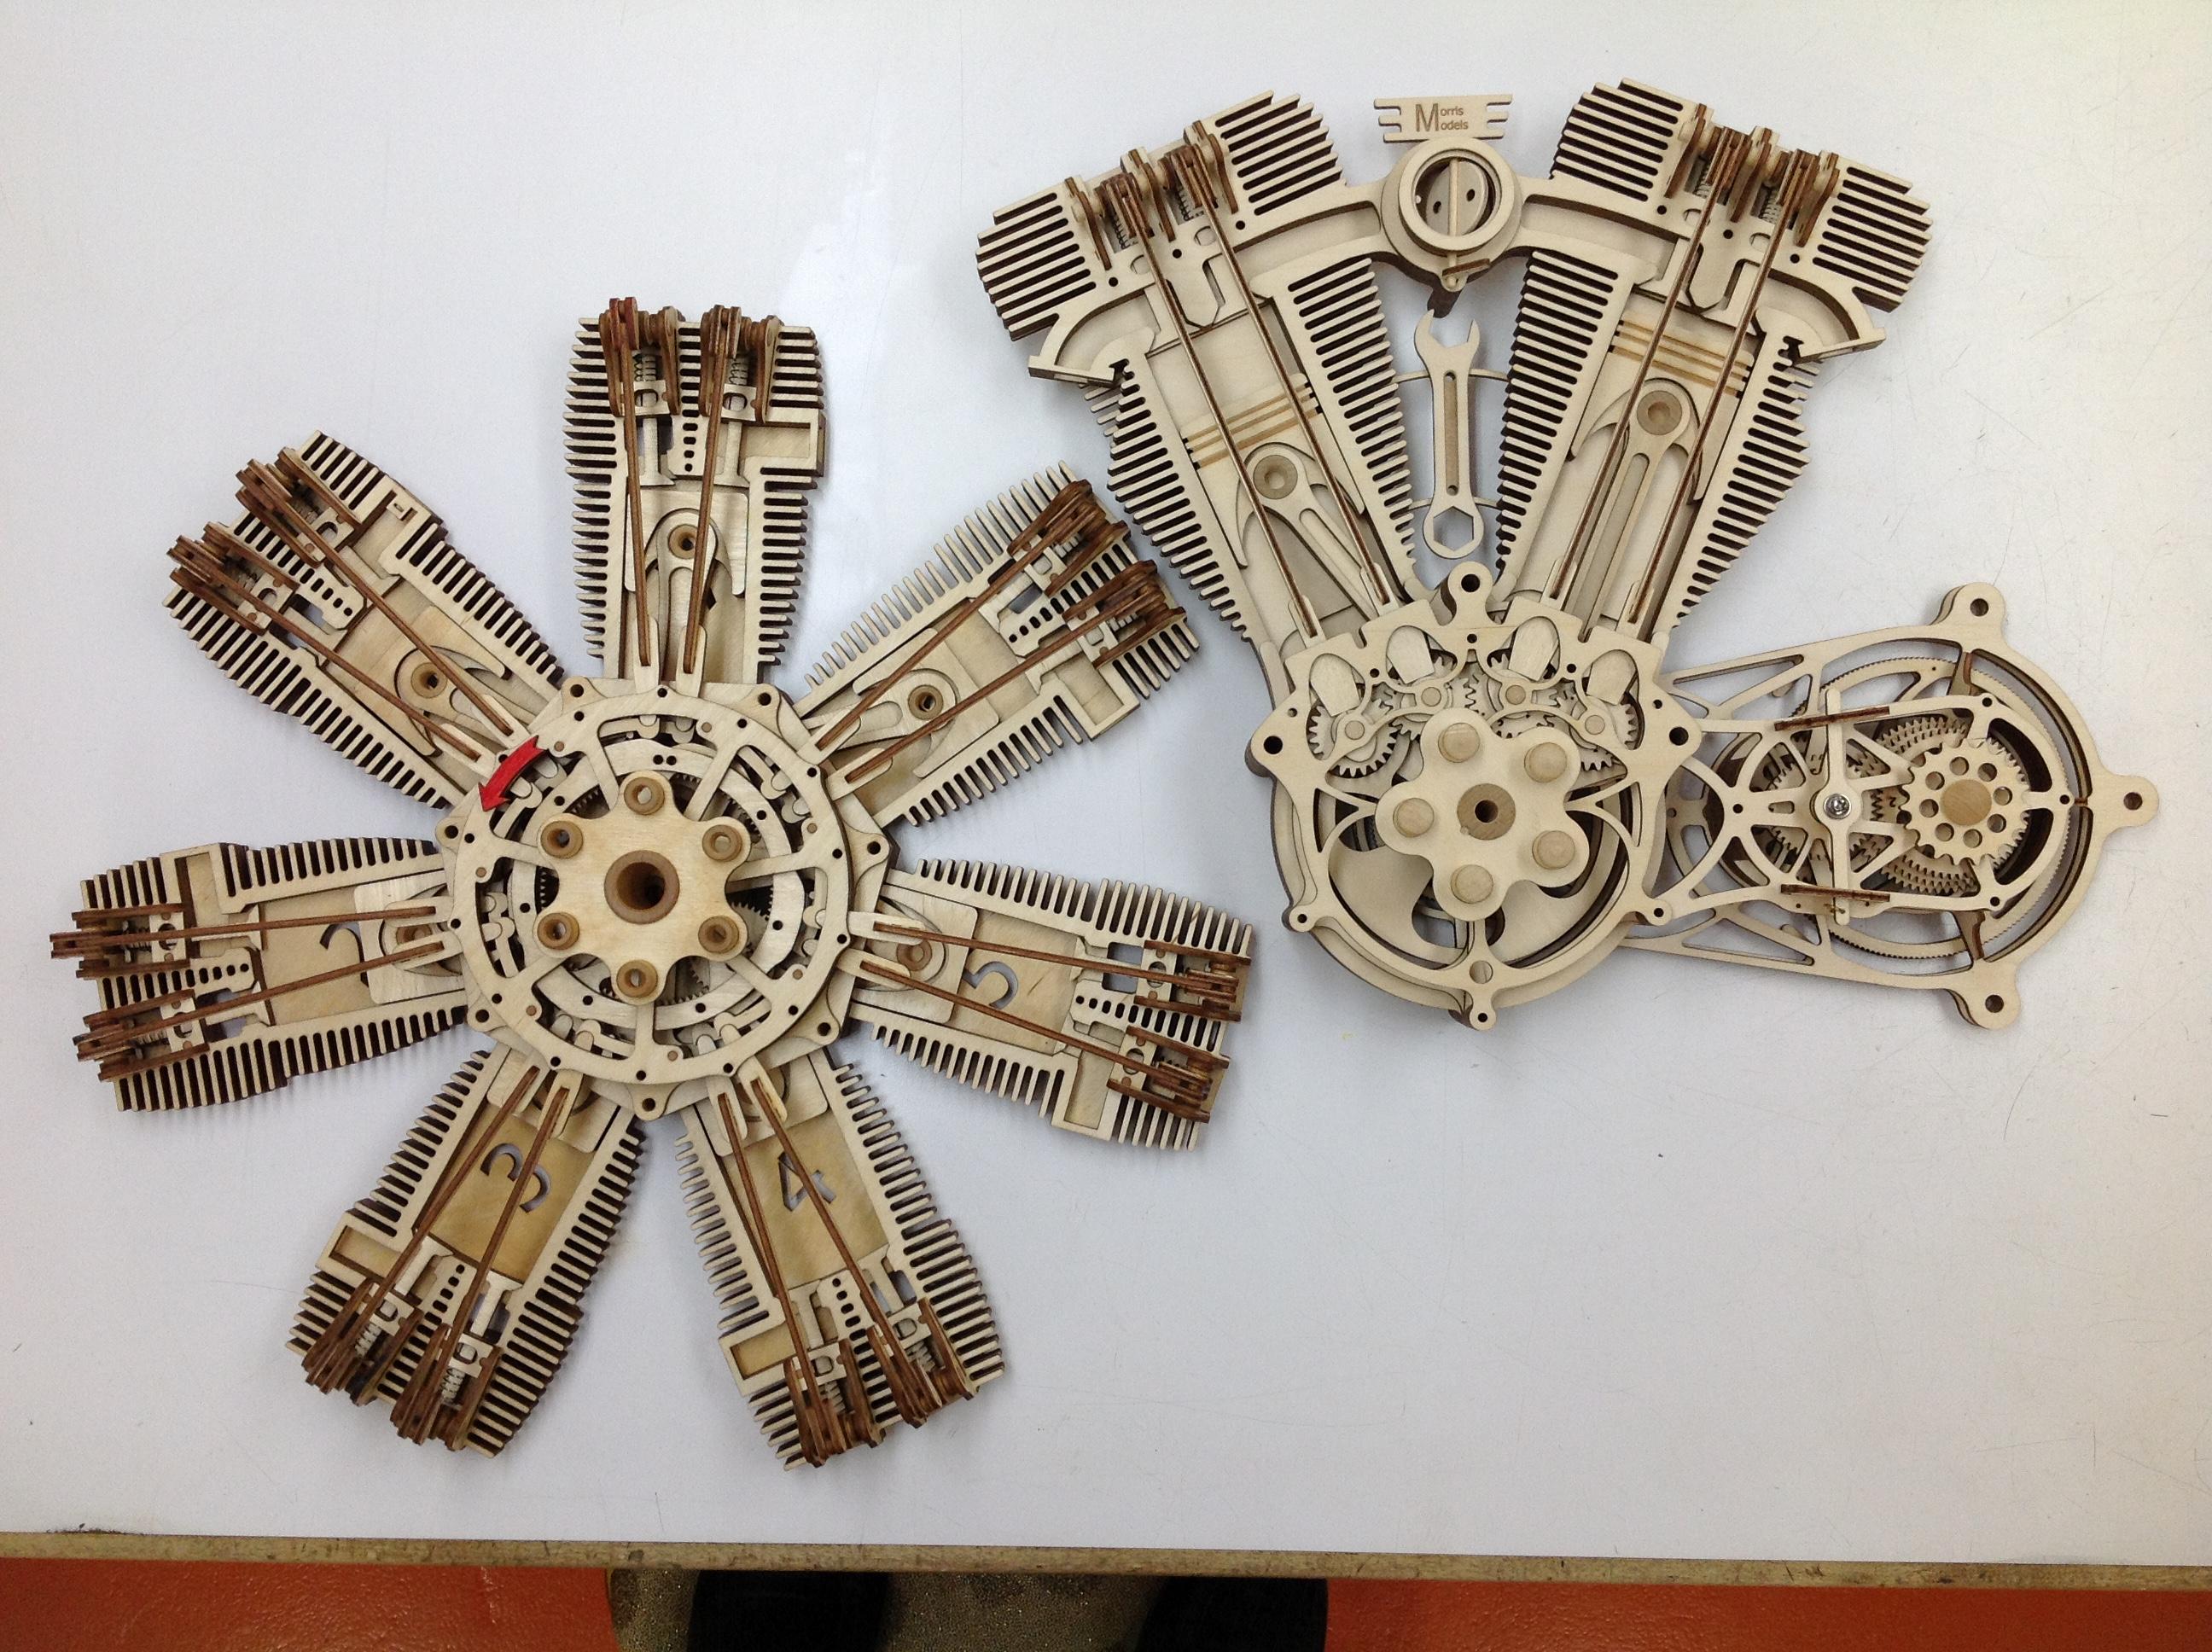
February 24, 2020 at 1:00 am #61KeymasterAlan Duke was an early supporter of Morris Models on our first Kickstarter. He purchased both the Radial and the V-Twin engines – at that time our only products. He sent pictures upon completion.
 February 24, 2020 at 1:04 am #63Keymaster
When Alan decided to build another radial engine, he decided to make it a show stopper. He painted each of the parts as he built them, using three separate coats of paint. I asked him about the paint, and this was what he said.
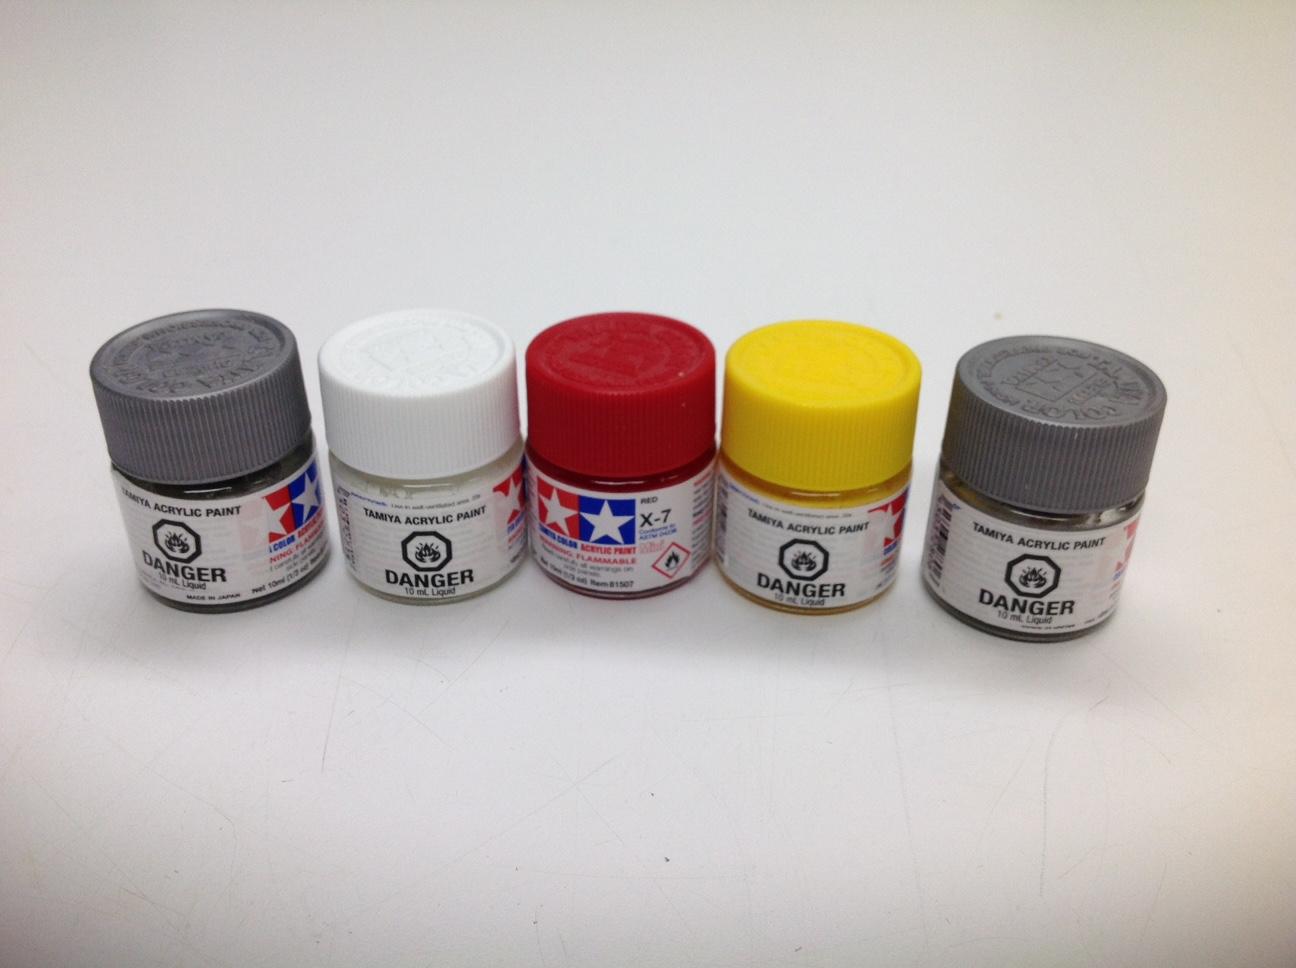
I used Tamiya Acrylic model Paint. The parts need to be well sanded and it takes three coats. Let it dry for several days and you should have no problems.
It looks like Alan color-coded the parts – an interesting concept.
February 24, 2020 at 1:07 am #64KeymasterAlan fabbed several parts to do his conversion.

He notes
- Distributer parts left to right.
- Distributer disc with 7 reed switches
- Mounting plate
- Drive gears.
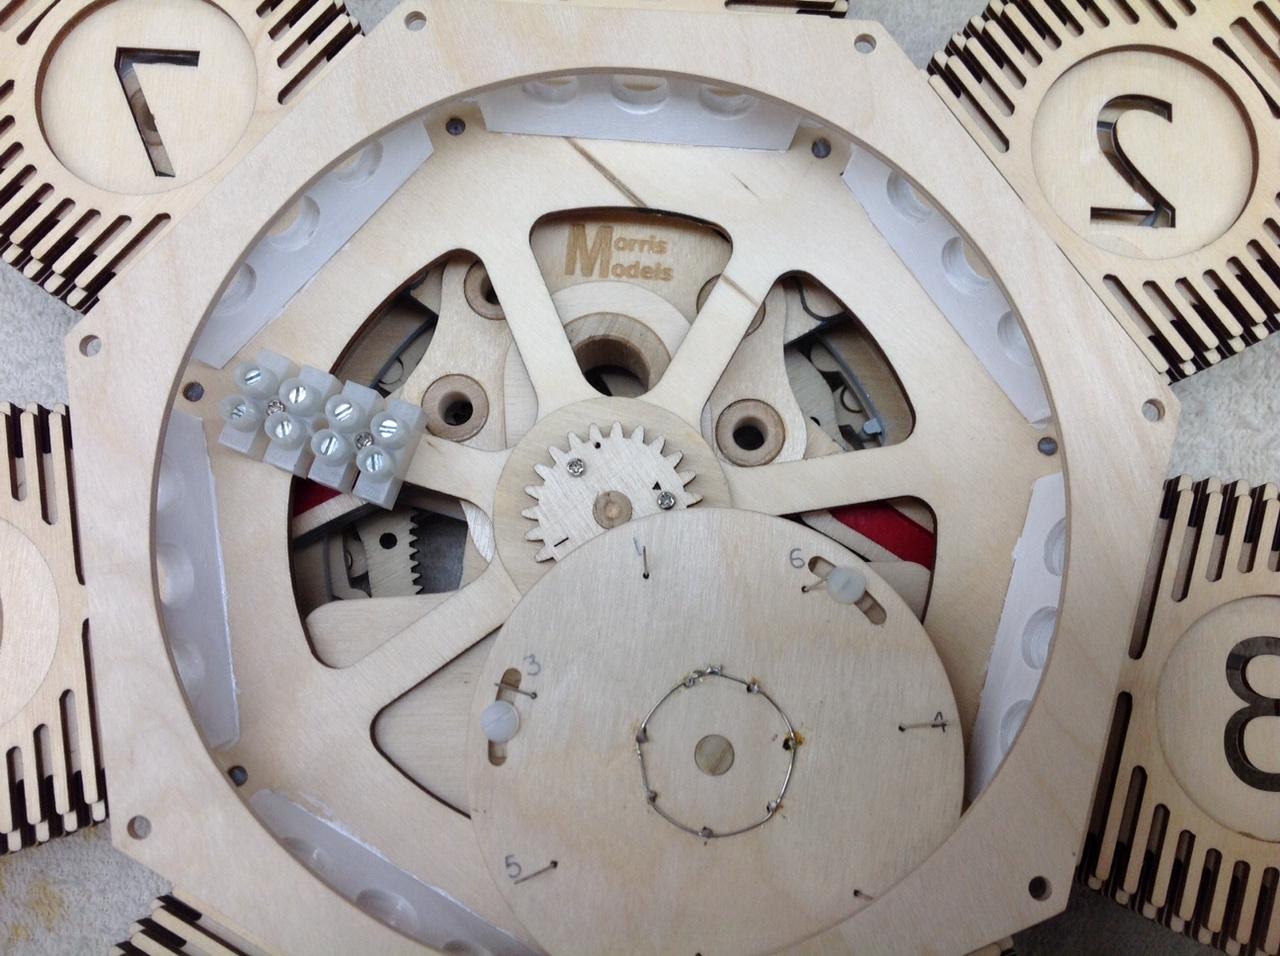
February 24, 2020 at 1:09 am #65KeymasterInstalling the parts, we get the following:
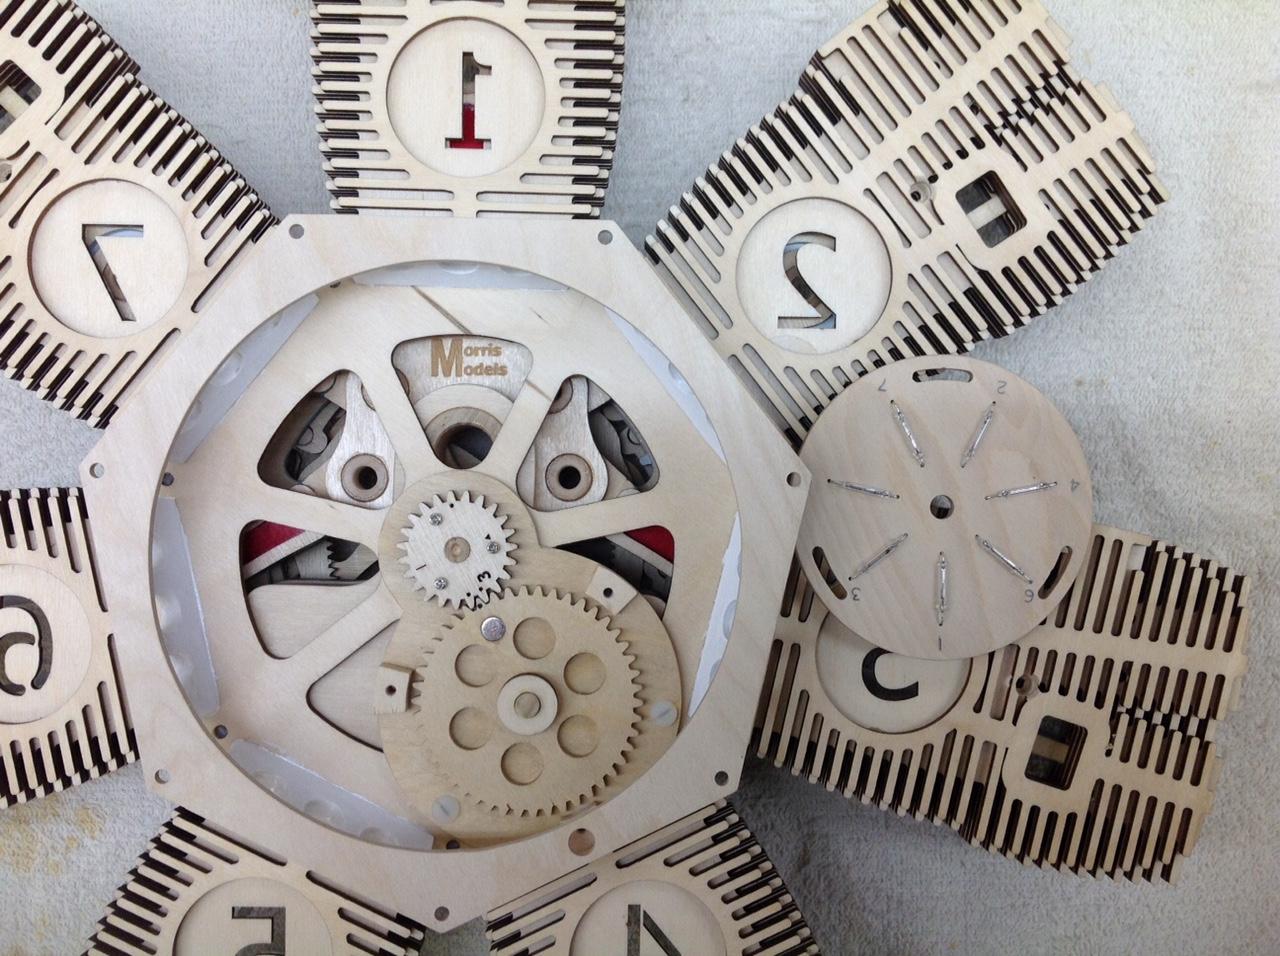
Alan notes the following:
- Mounted in engine showing the gear placement.
- 23 tooth gear was an extra from the V – Twin kit
- 46 tooth gear with the magnet I made
I note the following: Impressive!
February 24, 2020 at 1:14 am #67KeymasterI love the quality of Alan’s work. Note the semi-circular slots that allow him to set the timing.
Alan notes:
Ready for Wiring.
February 24, 2020 at 1:15 am #68Keymaster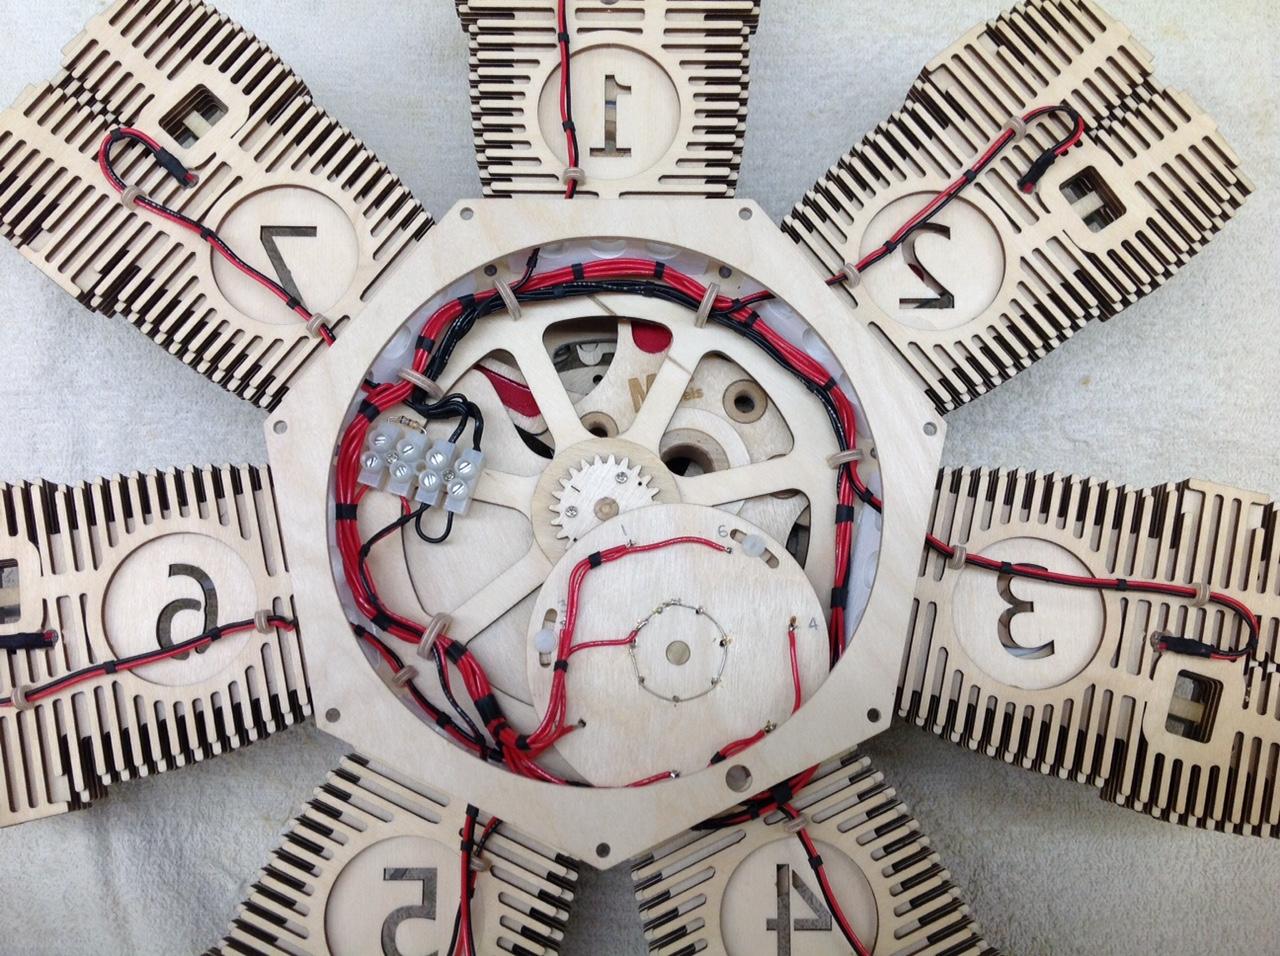
All wired and ready to go. I taped of the power supply for the case lighting, a 9 volt battery would also work.
February 24, 2020 at 1:18 am #69KeymasterAlan mounted the complete engine in a case with LED lights.
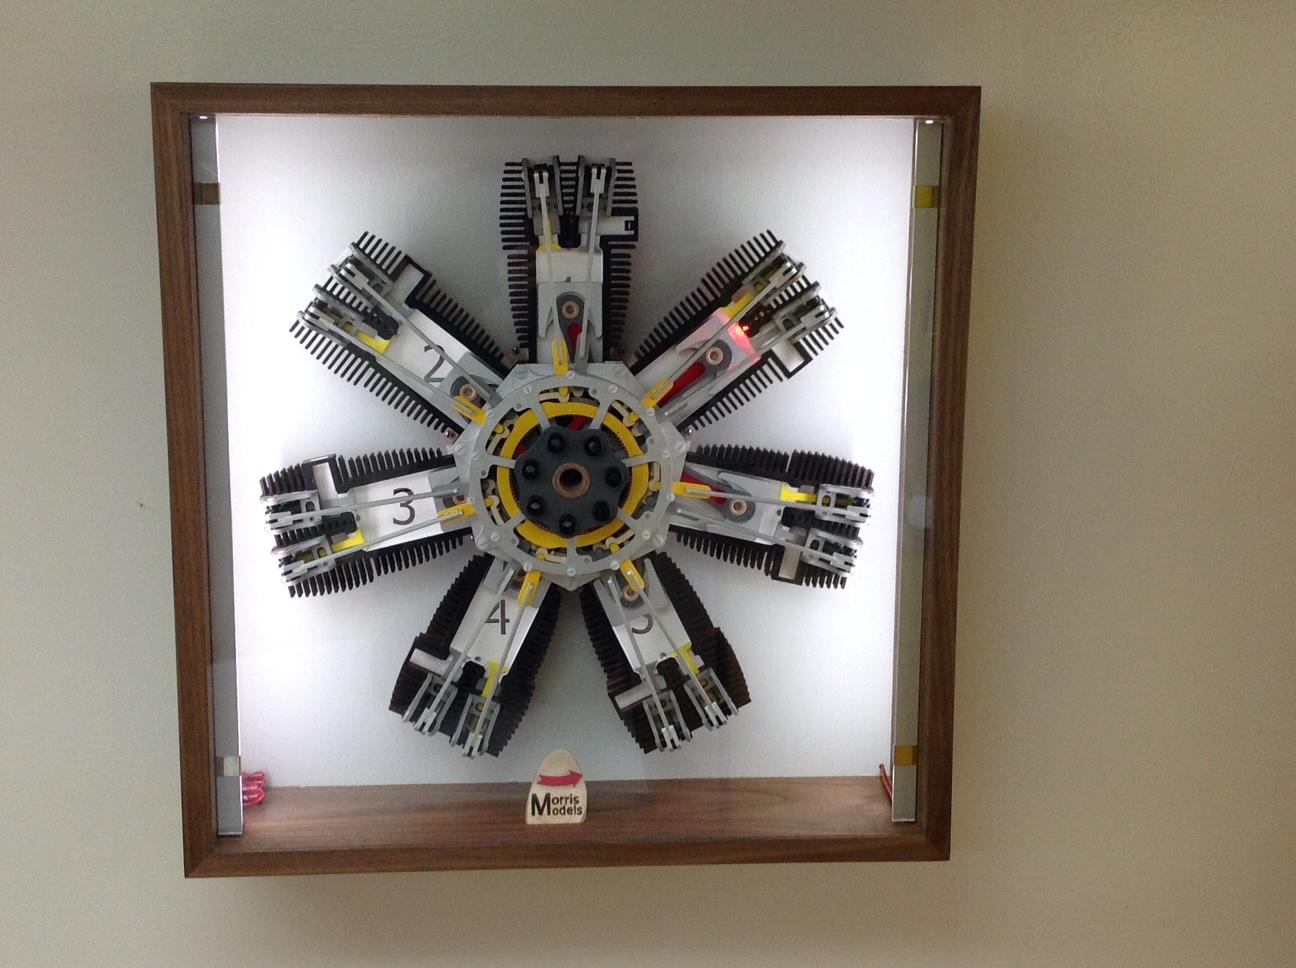
Of course his case is also a thing of beauty.
 February 24, 2020 at 1:20 am #70Keymaster
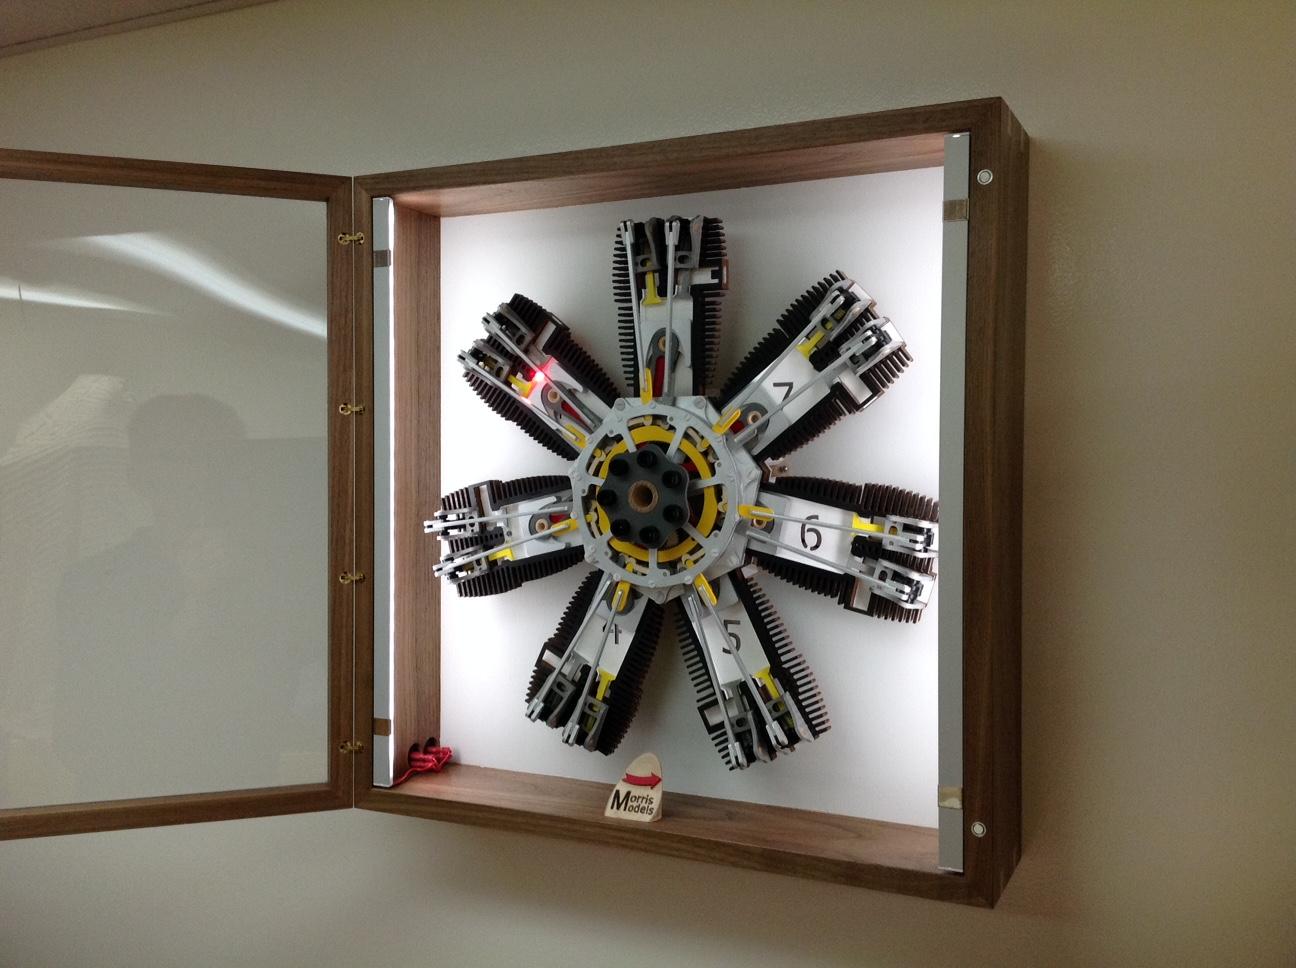
Alan ended his email with this picture:
He noted that he was providing “Full Credits.” I think that he deserves a lot of credit – and he inspired me to add ignition to my first rotary build – but that is a topic for another forum post.
Thanks, Alan, for sharing and inspiration.
May 13, 2020 at 12:43 pm #212Damon Humes
ParticipantThis is really cool. Would you happen to have a pattern of the distributor that I could use to cut out on a scroll saw. I’m building this with my daughter and think she we get a kick out of adding led lights.
July 12, 2021 at 12:01 pm #390spmartin1
ParticipantI too would like a pattern for those pieces, I want to install led’s in my model. also I would like a wiring schematic on how you wired it up.
-
AuthorPosts
- You must be logged in to reply to this topic.